
A well-designed backyard starts with a solid foundation, literally. Whether you’re planning a cozy patio retreat or a functional outdoor entertaining area, the right backyard tile choice sets the tone for everything that follows. Tiles aren’t just practical: they’re your canvas for color, pattern, and personality. From sleek porcelain to rustic natural stone, backyard tile ideas for 2026 lean toward durability without sacrificing style. This guide covers 25 distinct approaches to outdoor tiling, material options that actually stand up to weather, installation strategies that stick, and maintenance routines that keep your space looking fresh year after year.
Key Takeaways
- Backyard tile ideas for 2026 prioritize durable materials like porcelain and natural stone that resist freeze-thaw cycles, UV exposure, and moisture while maintaining aesthetic appeal.
- Proper substrate preparation with a 1/8-inch slope per linear foot for drainage and level surface is essential to prevent water pooling, frost heave damage, and premature tile failure.
- Modern patio tile designs favor large-format tiles (12×24 inches or larger) in muted tones for contemporary spaces, while traditional patios benefit from smaller formats with classic patterns like herringbone.
- Epoxy or urethane-based grout significantly outlasts standard cement grout near pools and in wet climates, with wider grout joints (3/8–1/2 inch) accommodating expansion and contraction better than tight joints.
- Natural stone tiles require sealing every 1–2 years depending on climate and foot traffic, while porcelain rarely needs sealing but demands careful material selection with water absorption below 0.5%.
- Balancing color psychology and scale—using warm earth tones in small spaces and avoiding large-format tiles in tiny yards—transforms a functional patio into a visually sophisticated outdoor living area.
Patio Tile Designs for Modern and Traditional Spaces
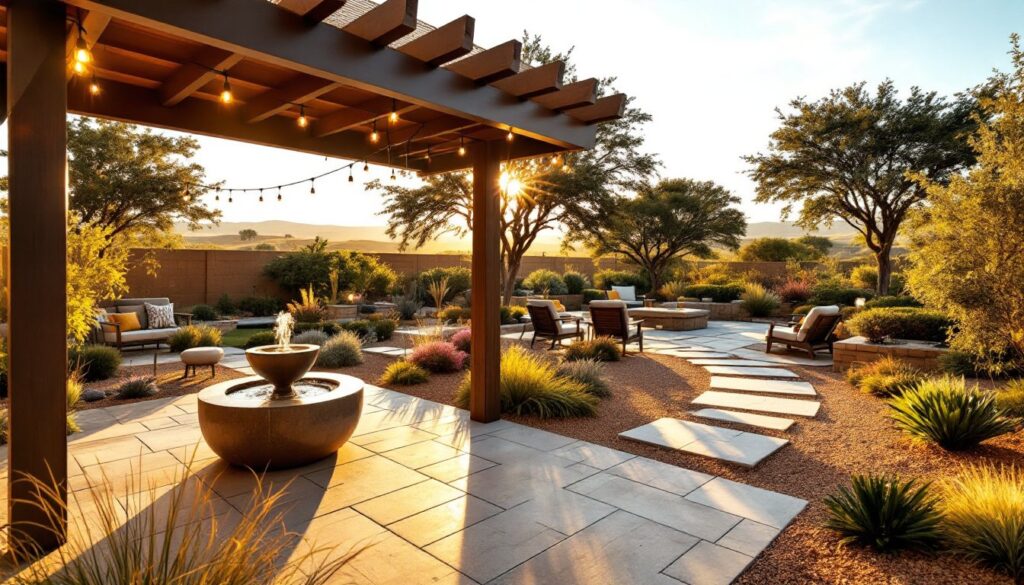
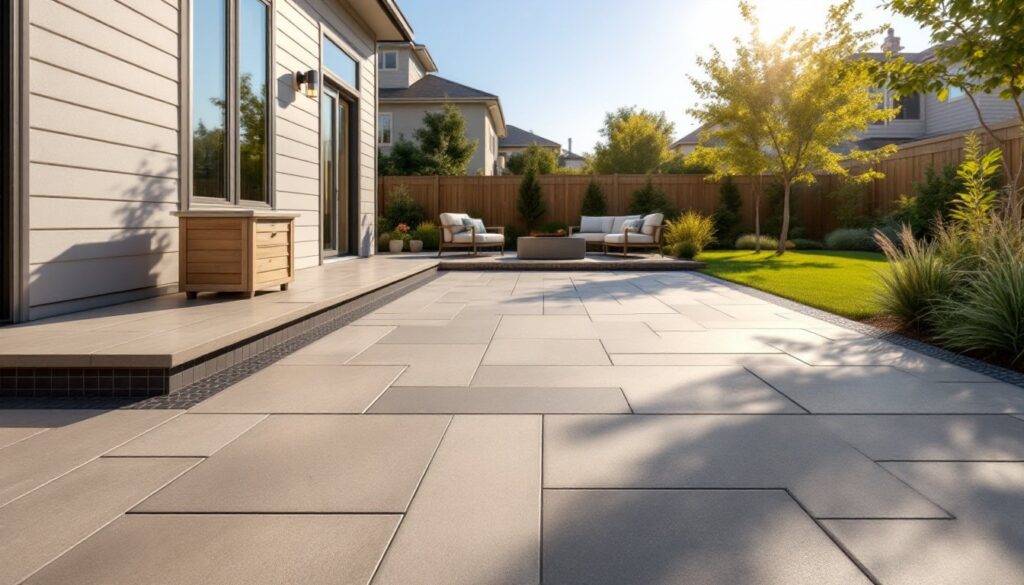
Your patio tile design establishes the visual identity of your entire outdoor living area. Modern spaces gravitate toward large-format tiles, typically 12-by-24 inches or larger, in muted tones like charcoal, warm grays, or soft taupe. These minimize grout lines and create a clean, contemporary feel. Traditional patios benefit from smaller formats, often 8-by-8 or 12-by-12 inch squares, paired with classic patterns like herringbone or running bond.
For classic Mediterranean vibes, hand-painted ceramic tiles with blues, terra-cotta accents, and intricate Moroccan-inspired geometry remain timeless. A transform your backyard patio adds another layer of inspiration for cohesive design.
Linear or stacked patterns work well in narrow yards, visually elongating the space. Diagonal layouts, though requiring more cutting waste, can make square areas feel dynamic. Pro tip: Lay out your tile design dry first (without adhesive) to catch layout issues before you commit. Accounting for a slight slope toward drainage, at least 1/8 inch per linear foot, prevents standing water and frost heave damage in winter.
Mixing tile sizes (subway-sized with larger squares) adds interest without overwhelming the space. Keep your home’s architectural style in mind: a rustic farmhouse patio clashes visually with ultra-modern porcelain, no matter how durable the tile itself.
Durable Tile Materials Built to Withstand Outdoor Conditions
Outdoor tiles must handle freeze-thaw cycles, UV exposure, moisture, and foot traffic that indoor tile never faces. Material selection directly impacts longevity.
Porcelain dominates modern outdoor tile. It’s fired at higher temperatures than ceramic, making it denser and less porous. Look for water absorption ratings below 0.5% (technical spec found on tile data sheets). Porcelain resists staining, supports cold climates, and rarely chips. The trade-off: harder to cut, requiring a wet saw.
Natural stone, slate, travertine, sandstone, limestone, ages beautifully and feels authentic. But, these materials are porous and require sealing every 1-2 years, depending on local climate and foot traffic. Slate holds up exceptionally well in freeze-thaw regions due to its tight grain structure. Limestone and travertine are softer and stain more easily: they’re better suited to sheltered patios or covered decks.
Quarry tile, an unglazed ceramic, provides a rustic aesthetic and excellent grip when wet. It’s durable but still requires sealing and can chip at edges.
Concrete pavers aren’t technically tile, but they’re worth mentioning: affordable, modular, and easy to replace individually if damaged. They lack the polish of tile but require no skilled installation.
Always verify frost ratings on product spec sheets. A tile rated PEI 3 or higher resists wear. ASTM standards govern slip resistance: outdoor tiles should meet ASTM C1028 with a coefficient of friction above 0.60 when wet. Check water absorption rates and freeze-thaw test results, non-negotiable in cold climates.
Poolside and Deck Tiling Solutions
Poolside and wet-deck tiles demand non-slip surfaces and exceptional durability. Standing water, chlorine exposure, and intense foot traffic create a harsh environment.
Textured porcelain with a matte finish or brushed surface excels at poolside. Glazed tiles become slippery when wet, never acceptable near water. The stone deck tiles from Gardenista showcase excellent material options for pool decking, including marble, slate, and sandstone varieties that balance aesthetics with functionality.
Saltillo tile, a hand-pressed Mexican ceramic, resists chlorine well and ages gracefully, but it’s porous and demands yearly sealing. It’s better for covered pool areas than direct poolside.
Grout selection matters as much as tile choice. Standard cement grout absorbs water and chlorine, degrading faster. Epoxy or urethane-based grout resists chemical damage and moisture penetration far better, though it costs 2-3x more and requires skilled application. For a pool project, invest in epoxy.
Tile spacing (the width of the grout joint) affects both aesthetics and durability. Wider joints, 3/8 to 1/2 inch, accommodate expansion and contraction better than tight 1/8-inch joints, especially in freeze-thaw zones. This also makes cleaning easier.
Deck tiles installed over existing concrete must account for the substrate’s movement. A proper underlayment system absorbs minor shifts. Skip this step, and tiles crack within 2-3 seasons.
Creative Patterns and Color Combinations
Pattern and color turn a functional patio into a visual statement. The key is balancing personality with practicality.
Geometric patterns, chevron, diagonal stripes, or hexagon mosaics, add movement and sophistication. They work best in smaller focal areas (a patio entry, a fire pit surround) rather than the entire surface, which can feel overwhelming. Accent borders in contrasting colors frame the main field tile elegantly.
Color psychology matters outdoors too. Warm earth tones (terracotta, warm gray, sand) recede visually, making small patios feel larger. Cool grays and blues feel contemporary. Dark tiles mask dirt but absorb heat intensely, uncomfortable to walk on barefoot in summer. Mid-tone colors balance aesthetics and practicality.
Mixed materials create visual interest: pair large porcelain squares with smaller mosaic accents, or combine slate with glass-tile inlays (glass resists staining and adds shimmer). Feature walls in wood-look porcelain behind outdoor kitchens or seating nooks ground the space.
Before committing, order sample tiles and lay them in the actual space at different times of day. Sunlight changes color perception dramatically. A warm-gray tile that looks sophisticated at noon might feel cold at sunrise. Natural stone especially varies in color from piece to piece: ask suppliers to batch tiles if uniform color matters.
Scale matters too. Large-format tiles dwarf tiny yards, making them feel cramped. Smaller formats in intimate spaces prevent visual chaos.
Budget-Friendly vs. Premium Tile Options
Tile costs range wildly, from $1-2 per square foot for basic ceramic to $15+ per square foot for imported marble or specialty porcelain. Material grade isn’t the only cost factor: installation, substrate prep, and grout all add up.
Budget approach: Porcelain-look ceramic tiles ($2-4/sq ft) deliver durability without premium pricing. They won’t outlast true porcelain, but they’re reliable for 10-15 years in moderate climates. Keep patterns simple: intricate designs require more cuts and labor. A solid color or basic linear pattern maximizes material yield and minimizes waste. DIY installation saves significantly if you have experience, but poorly installed tile fails faster than poorly chosen tile.
Mid-range sweet spot: Mid-grade porcelain ($5-8/sq ft) offers near-luxury durability at reasonable cost. Natural stone sealed annually ($6-10/sq ft) balances authenticity and longevity. These options suit most homeowners’ needs without requiring a second mortgage.
Premium tiers: Hand-painted ceramics, imported Italian porcelain, exotic stones, or specialty finishes (textured, aged, metallics) command $12-30/sq ft or more. These shine in high-visibility areas or if you plan to stay put long-term and want heirloom-quality materials. Backyard makeovers on a budget demonstrate that style doesn’t demand luxury spending.
Hidden costs: substrate repair, underlayment, epoxy grout, sealant, and professional labor add $5-15/sq ft to material cost. A 300-square-foot patio with $6 tile, proper prep, and professional installation runs $3,000-5,500, not including patio furniture or landscaping. Budget accordingly.
Installation Tips and Maintenance for Long-Lasting Results
Even premium tile fails without proper installation and care. DIY tilers succeed with patience and attention to detail: contractors should be licensed and insured.
Preparation is non-negotiable. The substrate must be stable, level (within 1/8 inch over 10 feet), and free of debris. Concrete patios often have settlement cracks or low spots. A self-leveling underlayment or patch compound fixes minor issues: major cracks signal deeper structural problems requiring professional assessment. A properly sloped base (minimum 1/8 inch drop per linear foot toward drainage) prevents water pooling.
Adhesive selection varies by material and climate. Modified thin-set mortar suits most outdoor applications. Unmodified thin-set works with natural stone: modified versions bond better to concrete. In freeze-thaw zones, use a polymer-modified thin-set for flexibility. Never use regular tile mastic outdoors, it fails in freeze cycles.
Grout and spacing: Standard cement grout is acceptable for dry climates but risky near pools or in wet regions. Epoxy grout resists moisture and chemicals but requires skill to apply and clean. Joint width should be 1/8 to 1/2 inch depending on tile size and climate. Larger joints flex better, reducing cracking.
Maintenance: Seal natural stone tiles within 48 hours of installation, then every 1-2 years. Porcelain rarely needs sealing but benefits from periodic sealant on grout. Clean tiles quarterly with pH-neutral cleaner, acid-based cleaners etch stone. Pressure-wash at low pressure (under 1,500 PSI) or risk grout erosion. In winter, use calcium chloride ice melt (avoid rock salt, which degrades grout and stone). 10 creative DIY backyard projects offer additional installation insights for tile accents and features.
Check grout annually for cracks or deterioration, especially around tree roots or poor drainage. Small repairs early prevent expensive tile replacement.
Conclusion
Backyard tiles transform outdoor spaces into durable, beautiful living areas that reflect personal style and withstand years of weather and use. Success hinges on three pillars: choosing materials suited to your climate (frost ratings matter), investing in proper prep and installation, and committing to straightforward maintenance routines. Whether you’re leaning toward modern porcelain simplicity, rustic stone charm, or creative geometric patterns, thoughtful selection and honest workmanship ensure your tile investment pays dividends for years to come.