
A backyard cabana doesn’t have to cost $10,000 or require a contractor license. Whether you’re dreaming of a sun-soaked retreat, a covered entertainment zone, or a peaceful escape from the neighbors, there’s a cabana style and building method that fits your budget and skill level. This guide walks through classic and modern designs, practical construction approaches, and the details that turn a bare frame into a space you’ll actually use. From traditional open-air pavilions to sleek modern shelters, you’ll find ideas that transform your outdoor space without draining your wallet.
Table of Contents
ToggleKey Takeaways
- Backyard cabana ideas range from traditional open-air pavilions to modern minimalist designs, with costs from $1,200–$2,500 for DIY basic structures to fully finished spaces exceeding $10,000.
- Proper foundations using concrete footings below the frost line and pressure-treated lumber are essential to prevent wood rot and ensure longevity of your backyard cabana.
- Roofing options—from lattice slats ($300–600) to metal panels ($1,200–2,000)—directly impact shade, durability, and maintenance requirements; choose based on your climate and budget.
- DIY framing using standard pressure-treated lumber, basic tools (circular saw, drill, level), and proper fasteners (hot-dipped galvanized) makes cabana construction accessible for most homeowners.
- Comfort and function come from thoughtful additions: composite or sealed wood decking, layered shade with canvas panels, ambient lighting, and storage solutions that transform a bare frame into an inviting outdoor retreat.
- Building codes require permits for structures exceeding 200 square feet and calculations for local wind and snow loads; hiring a licensed contractor for design verification ($300–800) ensures compliance and safety.
Classic Cabana Styles for Every Backyard
Traditional Open-Air Designs
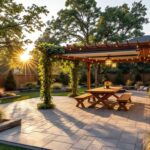
A traditional cabana, sometimes called a pavilion or pergola-style structure, relies on a simple post-and-beam frame with partial roofing. The appeal is straightforward: it provides shade without trapping heat, and it feels less heavy than a fully enclosed structure.
The bones of a traditional design rest on 4×4 or 6×6 lumber posts set into concrete footings (or piers for areas with freeze-thaw cycles). Cross beams typically run 2×8 or 2×10, depending on span and snow load in your region. A slatted or lattice roof allows dappled light through while blocking direct overhead sun. This open design keeps costs down, no walls, minimal electrical, and straightforward framing.
Building codes vary, but most jurisdictions require footings below the frost line, proper post-to-concrete connections, and calculations to verify the structure can handle local wind and snow loads. A permit is usually mandatory if the footprint exceeds 200 square feet, though check your local ordinances. Many DIYers tackle the framing themselves, but hiring a licensed contractor to stamp the design or verify calculations ($300–800) offers peace of mind and ensures code compliance.
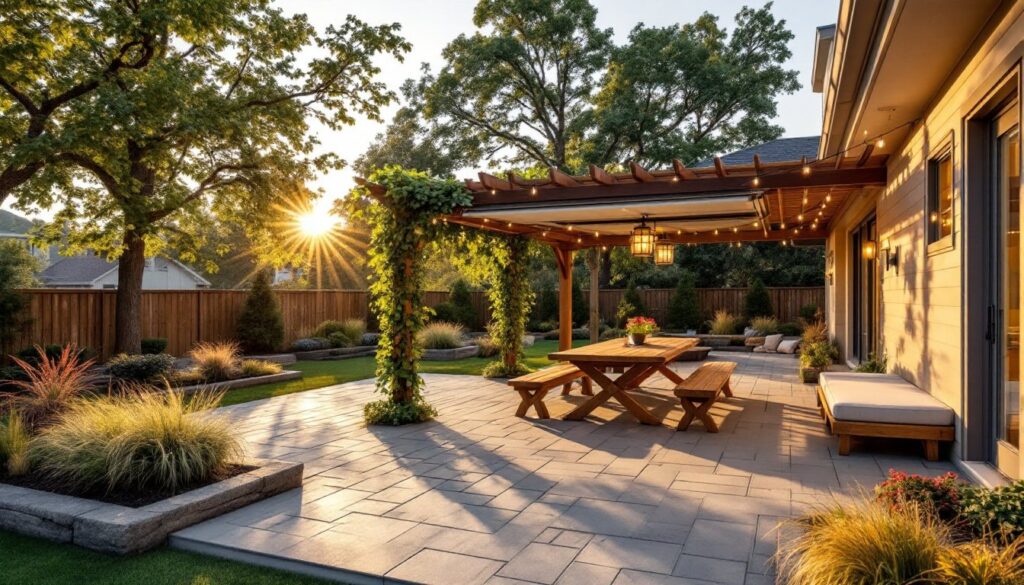
Traditional designs shine in warm climates where full sun avoidance matters most. They’re also flexible: add climbing vines, canvas shade panels, or string lights as your budget allows.
Modern Minimalist Cabanas
Modern cabanas strip away ornamental details and favor clean lines, flat or low-pitch roofs, and often a single material palette. Think steel posts with a solid composite roof panel, or a sleek timber frame with metal accents.
The minimalist approach often costs more upfront because materials like powder-coated steel, composite decking, or aluminum shade systems command premium prices. But, they require less ongoing maintenance than wood, no staining every few years, no slatted wood to replace. Structural requirements are identical to traditional builds, but the visual impact leans contemporary.
A popular budget-conscious take: use standard pressure-treated lumber framing with a metal roof (corrugated steel or aluminum panels, $3–8 per square foot installed). Pair it with simple fascia, minimal trim, and you’ve got a modern look without designer pricing. The single-roof pitch eliminates complex angles, reducing both material waste and installation headaches.
Modern designs work especially well when your cabana sits near the house or relates to existing architecture. They also pair nicely with outdoor kitchens, fire tables, or seating arrangements that become focal points rather than secondary accessories.
DIY Cabana Materials and Construction Methods
Building a DIY cabana breaks down into three phases: framing, roofing, and finishing. Your material choices directly affect cost, durability, and maintenance.
Framing: Standard pressure-treated lumber (Southern pine or hem-fir rated for ground contact) is the budget go-to. A 12×12-foot open structure needs roughly 8 posts (4×4), 4 beams (2×10), and rafter/truss framing, around $1,200–1,800 in lumber. Alternatively, steel posts ($100–150 each) eliminate wood rot and termite risk but add labor for bolting and welding connections. Fasteners matter: use hot-dipped galvanized bolts and hardware to prevent rust and wood staining. Stainless fasteners cost more but last longer in salt-air climates.
Roofing options:
- Lattice or open slats: $300–600 in materials: minimal shade.
- Corrugated plastic (polycarbonate): $800–1,200: translucent, passes UV light safely.
- Metal panels: $1,200–2,000: durable and modern-looking.
- Canvas or shade cloth: $200–500: temporary, replaceable annually.
- Solid framed roof with asphalt shingles: $1,500–2,500: maximum protection, resembles a small shed.
Foundations set the stage for longevity. Concrete footings (holes dug below frost line, 12–48 inches depending on climate, then backfilled with concrete) cost $50–150 per post hole if done by hand: rent an auger ($60–80/day) to speed the work and reduce fatigue. Premade concrete piers sit atop the ground and work in mild climates with good drainage. Never set posts directly on soil, wood will rot within 5–10 years.
Most DIYers tackle framing with basic tools: a circular saw, drill, level, and tape measure. A miter saw makes crosscuts cleaner and faster, especially for angles. Consider renting a scaffolding system ($150–300/week) if you’re working at height: it beats balancing on ladders. For roofing installation, whether panels or shingles, a sturdy ladder and a second pair of hands are essential. Fall protection (harness, rope) isn’t optional if you’re more than 6 feet off the ground: OSHA standards apply to residential work too.
Specific measurements: Nominal 2×10 lumber is actually 1.5 inches thick by 9.25 inches tall (milled down from rough-cut). Account for this when calculating beam spans and checking local load tables. A 12-foot span with a 40 psf snow load typically needs 2×10s on 16-inch centers: your local building department publishes span charts.
Adding Comfort and Functionality
A frame and roof create shelter, but comfort comes from flooring, shade adjustments, and thoughtful details.
Flooring and Foundation Options
Choosing flooring sets the tone. Concrete pads (4 inches of concrete over 2 inches of gravel base) cost $4–8 per square foot and require minimal maintenance, just sweep and wash occasionally. They’re practical but visually plain. Stamped or stained concrete ($6–12 per sq. ft. installed) adds pattern and color without much fuss.
Composite decking ($4–10 per sq. ft. material) mimics wood but resists rot, staining, and splinters. It’s pricier upfront but saves years of staining and sealing. Pressure-treated wood decking runs $2–4 per sq. ft. and requires annual or biennial sealing to prevent gray weathering and mildew. Tile works in covered spaces with proper drainage: use outdoor-rated porcelain or natural stone with slip-resistant finishes.
Foundation depth matters. Shallow concrete pads (2 inches) heave in freeze-thaw climates. Go 4 inches minimum, or hire a contractor familiar with local soil conditions to assess frost depth. In areas with clay or poor drainage, add a 4-inch compacted gravel base before pouring concrete, this prevents water pooling underneath.
Once flooring is set, add functional touches: built-in benches (framed with 2×4s, topped with composite or padded cushions, $300–600), ceiling fans (if you plan electrical, important for air circulation in humid climates), or side screens (roll-up shade cloth or lattice panels, $200–400). Lighting doesn’t require hard-wired circuits, solar string lights ($30–80) or battery-powered LED panels work and avoid permit hassles. If you do run electrical, hire a licensed electrician and pull permits: improper installations can cause fires or shock hazards.
Ventilation and drainage prevent moisture buildup. Ensure ground slopes gently away from posts and under the flooring: standing water invites rot and insects. In humid regions, openings (no solid walls) allow air to flow freely, one reason open pavilion designs outlast fully enclosed structures.
Decorating Your Cabana for Relaxation
The structure is done: now make it your space. Décor transforms a utilitarian shelter into an outdoor room.
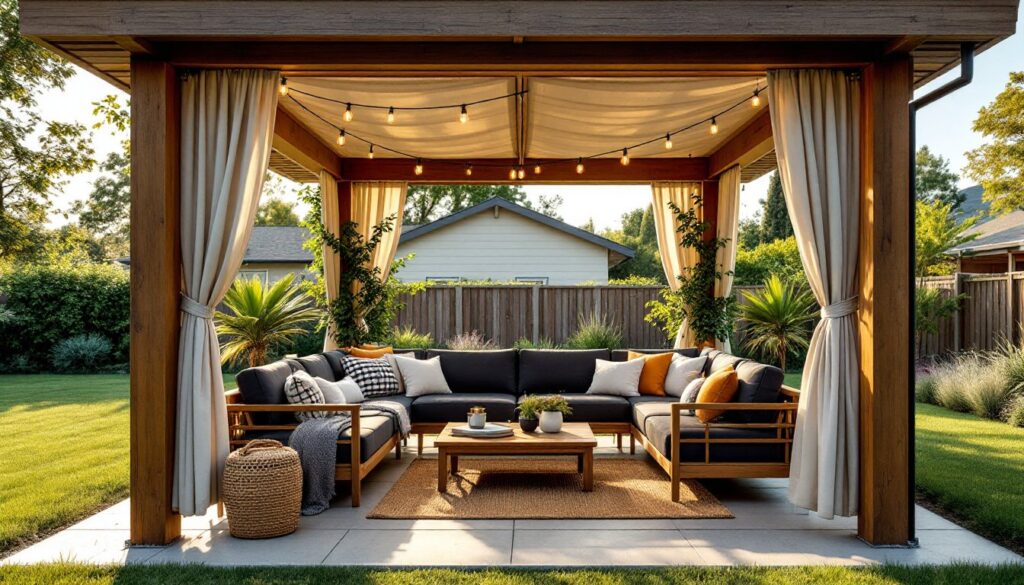
Seating and shade layers matter most. A sectional outdoor sofa (weather-resistant fabric, $600–1,500) anchors the gathering zone. Add a coffee table (teak, aluminum, or concrete, $200–500) and you’ve got an inviting lounge. Layered shade, a canvas pergola shade system ($200–400) draped over lattice, plus outdoor curtains ($100–250 per panel), creates cozy depth and privacy from neighbors.
Color and texture keep it interesting without Pinterest excess. Choose a neutral base palette (charcoal, tan, warm gray) and add accent colors through outdoor pillows and throws ($50–150 for a quality set). Natural textures, woven baskets, wooden side tables, potted plants, ground the space and age well.
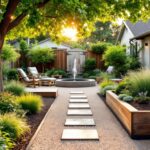
Plants and greenery serve double duty: they soften hard lines, provide natural cooling through transpiration, and define zones. Climbing vines on lattice create living shade and privacy. Potted shrubs or small trees (dwarf palms, ornamental grasses) add height and structure without renovating the landscape. Consult garden design inspiration for plant selection suited to your climate.
Lighting extends usability into evening. String lights overhead (cafe-style Edison bulbs, solar options, $30–100) create ambiance. Recessed solar deck lights ($15–40 each, 4–6 needed) illuminate pathways safely. A fire table or outdoor heater ($300–800) shifts the cabin into three-season use and justifies the investment for cooler months.
Storage keeps the space functional. Weatherproof outdoor cabinets or benches with lift-tops ($200–600) hide cushions, toys, and grilling supplies. Avoid plastic storage that degrades in sun: invest in UV-resistant or natural wood options treated for exterior use.
Final touches: a rug designed for outdoors (polypropylene or sisal blend, $150–400) defines the sitting area and adds warmth underfoot. An outdoor sound system (Bluetooth speaker or wired setup, $100–300) rounds out the retreat vibe. Browse home design ideas for inspiration on layout and styling that feels cohesive with your home’s character.